
One of my favorite breads is a no-knead bread recipe from FrugalLivingNW. There's only four ingredients: water, flour, yeast, and salt. It looks and tastes like Artisan bread from a bakery, which you would spend at least five bucks for, at the store. This will only cost you the flour! The biggest kicker is the bread requires time and a dutch oven. Here is my quick tutorial on the easiest bread recipe ever!
1. Right up front, you need to understand that this recipe is a slow rise recipe. It takes 12-18 hours to rise. I normally start my bread in the evening, right before going to bed.
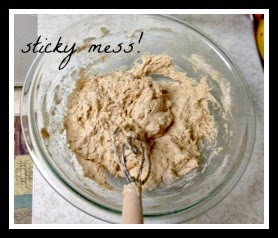
2. The first step is to mix the salt, yeast, and flour together. Then slowly add the water. It will be sticky, which is perfect. This is what mine looked like. I would mix my dough is a large glass bowl.
Cool tool alert! You don't need to be as fancy as me, but I LOVE this danish bread whisk. It's amazing for mixing bread. You can get it from Amazon for $7. It's totally worth buying if you are going to make bread on a regular basis. It makes mixing stiff dough a breeze! And it scrapes the sides really easily. Needlesstosay, I love it!
3. Cover your dough with plastic wrap and let it sit. It normally takes me 3 minutes to get the dough ready to go. It's that easy.

5. Set out parchment paper or a linen cloth (not terry cloth or it will stick) out with a generous amount of flour. Get your hands all floured up and gently form the dough into a nice round ball by tucking place it on the floured surface seam side down. Dump the dough onto the floured surface. The dough should be a smooth and not too sticky. Cover with linen cloth or parchment paper. I forgot to take a picture of mine, all pretty and smooth. Oops!
6. Let it rest again for another hour or two until it doubles in size. In the last 30 minutes or so, preheat oven to 425 and place your dutch oven inside to warm it. The oven needs to be hot before you put in your dough.

I don't have a 'real' dutch oven. What I do have a is Pampered Chef Stoneware Deep Covered Baker. It's a pretty amazing kitchen tool that I can microwave food in but also place in the oven. It can function as a dutch oven. I know that Amazon sells dutch ovens. It's on my list of things to be on the lookout for while at thrift shops.
7. Once your dough has doubled in size place in your dutch oven. I just slide the dough in straight from the parchment paper with the flour and all. No matter how it flops in, it always looks amazing! Cover with the lid and bake for 40 minutes. Your house will smell amazing. There's nothing like homemade bread baking in your oven. The only other smell I like as much is chocolate chip cookies. :-)
8. After 40 minutes remove lid. Don't forget to use your oven mitt; I'm speaking from experience. Then bake for additional 5-10 minutes, until golden brown. The internal temperature should be 200 degrees.

9. Remove from oven and rejoice at the beautiful bread you just baked! Place on a cooling rack. They say not to cut into it before it cools down. And I know that 'they' are right. But I won't say anything if you do.
Supposedly this bread is best the first 2-3 days. But I've never had any leftover past three days. :-) If you wrap it up in plastic wrap it will make the crust soft. I would keep it my dutch oven.
If you have questions, the FrugalLivingNW site has a great FAQs. This is the best, easiest bread you could make. It's worth a try! Let me know how it goes!
No comments:
Post a Comment